

Imagine biting into a rich, velvety bar layered with creamy chocolate and crunchy Oreo biscuits. You’re instantly transported back to simpler times—perhaps childhood birthday parties or cozy evenings spent indulging in comfort food. Whether you’re baking for a special occasion or simply craving something sweet, [Chocolate Oreo Biscuit Bars] are the perfect balance of nostalgia and indulgence. In this guide, we’ll dive deep into what makes these treats so irresistible, how you can whip them up at home, and even where to find pre-made options if you’re short on time. Let’s get started!
What Are Chocolate Oreo Biscuit Bars, and Why Do They Stand Out?
When it comes to desserts, few things hit the spot quite like [Chocolate Oreo Biscuit Bars]. These bars combine the best elements of cookies, chocolate, and gooey fillings into one compact treat. But what exactly sets them apart from other baked goods?
Key Features That Make Them Irresistible
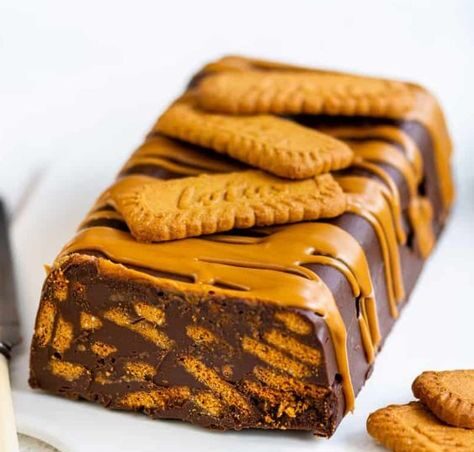
- Rich Layers : At their core, these bars feature a buttery base made from crushed Oreos, topped with a generous layer of melted chocolate and finished with more cookie crumbles for texture. The result? A symphony of flavors that satisfies every craving.
- Versatility : Unlike some desserts that only shine during specific seasons, [Chocolate Oreo Biscuit Bars] are year-round crowd-pleasers. They work equally well as party favors, holiday gifts, or late-night snacks.
- Easy-to-Make : If you’ve ever been intimidated by complicated recipes, fear not. Making these bars requires minimal effort but delivers maximum flavor. All you need is a handful of ingredients and about 30 minutes of prep time.
Health Considerations (Optional)
While indulgence is key here, moderation is always wise. Portion control ensures you enjoy your treat without overdoing it. Additionally, opting for dark chocolate instead of milk chocolate adds antioxidants while still satisfying your sweet tooth. Studies suggest that moderate consumption of chocolate may even boost your mood—a win-win situation!
How to Make Your Own Chocolate Oreo Biscuit Bars
Now that you know why these bars are worth making, let’s walk through the process step-by-step. Trust us—you don’t need to be a professional baker to pull this off.
Ingredients You’ll Need
Here’s everything you’ll need to create these decadent bars:
Pro Tip : Crush the Oreos finely for a smoother base or leave larger chunks for added crunch.
Step-by-Step Instructions
- Prepare the Base Layer : Start by combining your crushed Oreos with melted butter. Mix until the crumbs resemble wet sand, then press the mixture firmly into a lined baking pan. This will serve as the sturdy foundation for your bars.
- Add the Filling : Pour sweetened condensed milk evenly over the base. Use the back of a spoon to spread it out smoothly—it should act as a glue between the layers.
- Top It Off : Melt your semi-sweet chocolate gently in the microwave or using a double boiler. Once smooth, pour it over the condensed milk layer and use a spatula to distribute evenly. Sprinkle additional Oreo crumbs on top for extra flair.
- Chill and Slice : Place the pan in the refrigerator for at least two hours to allow the layers to set. Afterward, lift the bars out of the pan using the parchment paper lining and slice them into squares.
Bonus Hack : For an elevated experience, sprinkle a pinch of sea salt atop the melted chocolate before chilling. The salty-sweet combination is divine!
Creative Variations of Chocolate Oreo Biscuit Bars
One of the best parts about [Chocolate Oreo Biscuit Bars] is their adaptability. Here are some fun twists to keep things interesting:
Flavor Twists
- Mint Chocolate : Add a drop of peppermint extract to the chocolate layer for a refreshing twist. Perfect for holidays like Christmas or St. Patrick’s Day.
- Peanut Butter Delight : Swirl peanut butter into the chocolate layer for a nutty contrast. Drizzle it on top for visual appeal too.
- White Chocolate Bliss : Swap semi-sweet chocolate for white chocolate chips to create a lighter, creamier version.
Pages: 1 2
